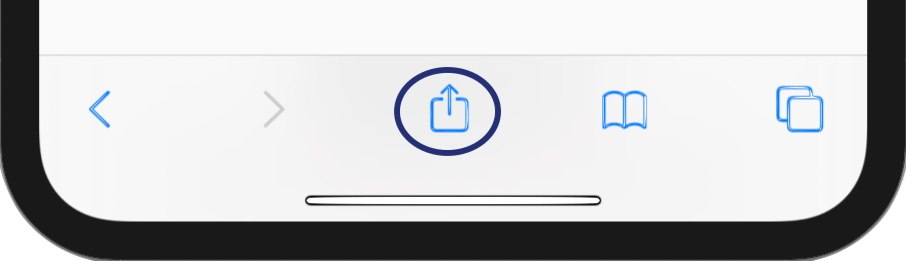
iOS comes with a plethora of App Extensions that you can use to improve the functionality and the user experience of your app. An example of such extension, and the topic of this post is the Share Extension. This extension makes your app appear on a list of apps when the user presses the share button on apps like, for example, a webpage on Safari, an image on Photos, a simple text and so on.
Adding a Share Extension to your app is straight-forward since Xcode offers a Share Extension template that you can use when creating a new one.
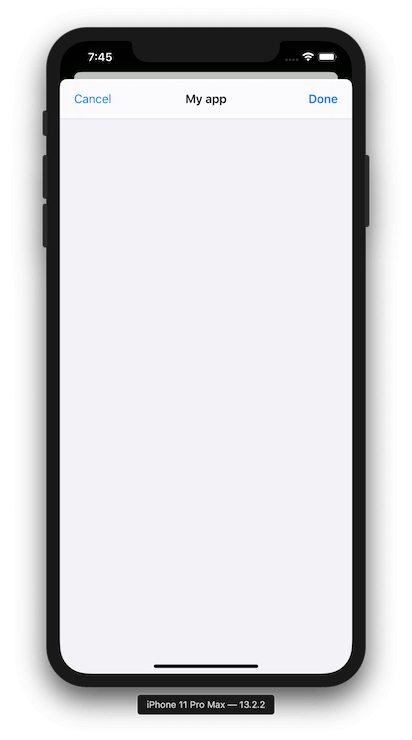
The target created by this templates contains, amongst others, a ViewController that complies to SLComposeServiceViewController. As a result, the UI is quite predefined and there is little you can do to interfere with it. Now, if you try to run the target in Safari, it will look like the following screenshot.
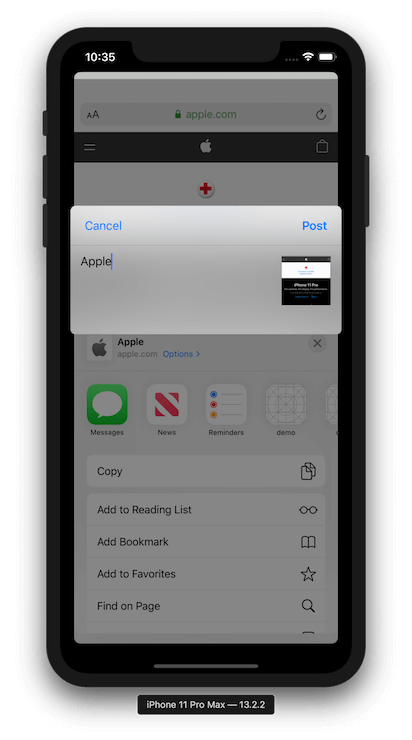
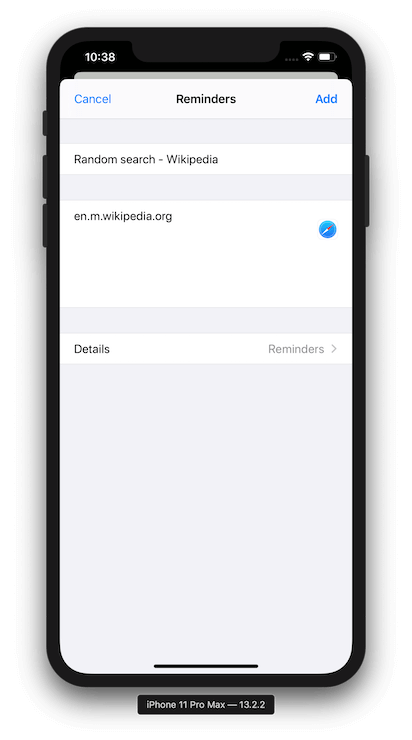
Comparing this with the UI of the Share Extension of other apps, you will find out that apps like the Reminders have quite different UI, which is more appealing, covers the bigger part of the screen and thus allowing the user to focus on the task in place.
Hmm!! ![]() Is it possible to achieve a similar design for the
Is it possible to achieve a similar design for the Share Extension of our app? This is the question I will try to answer in this post.
Long story short, the answer is that we can definitely achieve a design like this by creating a Share Extension as usual, but this time removing the conformance to SLComposeServiceViewController. As a result, we will no longer rely on the methods like isContentValid and configurationItems. Instead, we have to provide our own implementation.
Let’s see how this can be done step by step.
Implementation
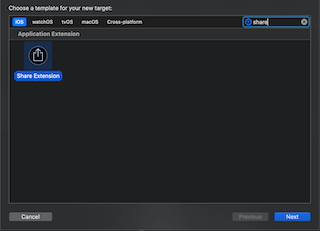
Let’s start with adding a new extension. First, use the top menu to navigate to File > New > Target. There, search for and choose the Share Extension option from the list of the templates for an iOS app. Name it as you wish and press Activate on the pop up that will be displayed after that.
If you now run the extension against Safari using a Simulator you will get a UI similar with the image mentioned before. Now that we have our extension in place, let’s see how we can change the UI to look more like the Reminders app.
The extension that we have created consists of 3 files; the ShareViewController.swift, the MainInterface.storyboard and the Info.plist. For this task, I am not going to use the Storyboard but rather build the UI programmatically.
Swift code
Head to the ShareViewController.swift and delete the whole ShareViewController class. In its place, add a new class named CustomShareViewController with the following content:
class CustomShareViewController: UIViewController {
    override func viewDidLoad() {
        super.viewDidLoad()

        // 1: Set the background and call the function to create the navigation bar
        self.view.backgroundColor = .systemGray6
        setupNavBar()
    }

    // 2: Set the title and the navigation items
    private func setupNavBar() {
        self.navigationItem.title = "My app"

        let itemCancel = UIBarButtonItem(barButtonSystemItem: .cancel, target: self, action: #selector(cancelAction))
        self.navigationItem.setLeftBarButton(itemCancel, animated: false)

        let itemDone = UIBarButtonItem(barButtonSystemItem: .done, target: self, action: #selector(doneAction))
        self.navigationItem.setRightBarButton(itemDone, animated: false)
    }

    // 3: Define the actions for the navigation items
    @objc private func cancelAction () {
        let error = NSError(domain: "some.bundle.identifier", code: 0, userInfo: [NSLocalizedDescriptionKey: "An error description"])
        extensionContext?.cancelRequest(withError: error)
    }

    @objc private func doneAction() {
        extensionContext?.completeRequest(returningItems: [], completionHandler: nil)
    }
}
This class inherits directly from UIViewController and for now we simply set a different background color and the navigation Bar which will contains a title and two buttons; one to cancel and one to complete the share request.
After that we will create a subclass of UINavigationController which we will name CustomShareNavigationController and which will contain the following content:
// 1: Set the `objc` annotation
@objc(CustomShareNavigationController)
class CustomShareNavigationController: UINavigationController {

    override init(nibName nibNameOrNil: String?, bundle nibBundleOrNil: Bundle?) {
        super.init(nibName: nibNameOrNil, bundle: nibBundleOrNil)

        // 2: set the ViewControllers
        self.setViewControllers([CustomShareViewController()], animated: false)
    }

    @available(*, unavailable)
    required init?(coder aDecoder: NSCoder) {
        super.init(coder: aDecoder)
    }
}
In this class we set the view controllers inside the init method. Also, notice that we have added the @objc annotation.
And that’s it with the Swift code for now.
Before we move on to the
Info.plist, if you want to, you can move these classes to separate files or rename the current one.
Info.plist
Inside the Info.plist we have to make a few changes. Firstly, I would suggest to open the file as source code by right-clicking on the file and then selecting Open As -> Source Code. This would make it easier to copy and paste or remove the chunks that we are going to change.
Let’s start by adding the following key-value pair inside the NSExtension dict to define which is the principal class for our extension:
<key>NSExtensionPrincipalClass</key>
<string>CustomShareNavigationController</string>
After that we can remove the Storyboard related entry:
<key>NSExtensionMainStoryboard</key>
<string>MainInterface</string>
Finally, we will replace the value for the NSExtensionActivationRule from
<string>TRUEPREDICATE</string>
to
<dict>
    <key>NSExtensionActivationSupportsWebPageWithMaxCount</key>
    <integer>1</integer>
    <key>NSExtensionActivationSupportsWebURLWithMaxCount</key>
    <integer>1</integer>
</dict>
which declares the maximum number of web pages and URLs that our Share Extension supports.
Now, we can also remove the MainInterface.storyboard file and finally we are ready to run the extension on Safari.
The end result will be like this:
Adding UI components
On top of that, we can customize the UI as usual with Auto Layout. For example, we can add a UITextField by modifying the CustomShareViewController.
We will have to add a property for the UITextField and one method named setupViews() which is responsible for adding the UITextField to the UI like in the following snippet:
    private lazy var textField: UITextField = {
        let textField = UITextField()
        textField.text = "some value"
        textField.backgroundColor = .white
        textField.translatesAutoresizingMaskIntoConstraints = false

        return textField
    }()

    private func setupViews() {
        self.view.addSubview(textField)
        NSLayoutConstraint.activate([
            textField.leadingAnchor.constraint(equalTo: self.view.leadingAnchor),
            textField.trailingAnchor.constraint(equalTo: self.view.trailingAnchor),
            textField.centerYAnchor.constraint(equalTo: self.view.centerYAnchor),
            textField.heightAnchor.constraint(equalToConstant: 44)
        ])
    }
Then, we can call setupViews() from viewDidLoad() and if we run the app again we will see something similar to the following screenshot:
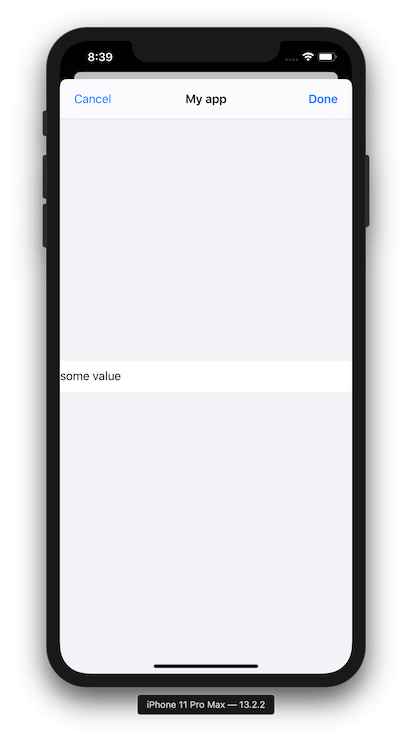
Similarly by adding more views into our controller we can achieve the custom UI that we want in our Share Extension. ![]()
Conclusion
And that’s about it for this post. In this post, we have seen how we could create a similar UI as the Reminders or Notes app for our Shared Extension. As it turned out, all we have to do is ignore the generated code from the template and rely on Auto Layout to implement the UI that we want. Similarly to what we do when developing an iOS app, we can add a UINavigationController, push instances of UIViewController to it and add custom view to our UIViewController.
As a next step, we can implement the logic to populate those fields with information like the title of the page and the URL. Probably this is a topic that I will cover in one of my next posts. So stay tuned!!
Thanks for reading! If you found this post useful, consider buying me a coffee to support the blog. For questions or comments, feel free to reach out on X!
Until next time!
