Two-way communication between an iOS WKWebView and a web page
Sometimes, on a native iOS app, there is the need to embed a web page within the application. To cater for cases like this, iOS provides WKWebView, an object that allows us to display web content in apps. WKWebView makes it easy and quite straightforward to load a web page, but what happens when we want to open a communication channel between the app and the web-page?
In this post I will show how to use Swift and JavaScript to communicate between the app and the web-page that is loaded on the WKWebView.
In order to do so, I am going to use an example to demonstrate how to achieve communication in both directions; both from the web page to the app and from the app to the web-page.
Let’s get started!
Implementation
The HTML file
For the sake of this article and for ease, instead of loading a URL, I am going to add an HTML file on the project and load that on the WKWebView. If you still want to use a URL, the process remains the same, with the only difference being that you need to load a URLRequest instead of a fileURL on the WKWebView.
Let’s create the HTML file, name it index.html and add the following content:
<!DOCTYPE html>
<html>
    <head>
        <meta name="viewport" content="width=device-width, initial-scale=1"/>
        <style>
            .switch { position: relative; display: inline-block; width: 60px; height: 34px; }
            .switch input { opacity: 0; width: 0; height: 0; }
            label.switch { outline: none; }
            .slider { position: absolute; cursor: pointer; top: 0; left: 0; right: 0; bottom: 0; background-color: #ccc; -webkit-transition: .4s; transition: .4s; outline: none; }
            .slider:before { position: absolute; content: ""; height: 26px; width: 26px; left: 4px; bottom: 4px; background-color: white; -webkit-transition: .4s; transition: .4s; }
            input:checked + .slider { background-color: #2196F3; }
            input:focus + .slider { box-shadow: 0 0 1px #2196F3; }
            input:checked + .slider:before { -webkit-transform: translateX(26px); -ms-transform: translateX(26px); transform: translateX(26px); }
            .slider.round { border-radius: 34px; }
            .slider.round:before { border-radius: 50%; }
        </style>
    </head>
    <body>
        <h2 id="value">Toggle Switch is off</h2>
        <label class="switch">
            <input type="checkbox" name="myCheckbox">
            <span class="slider round"></span>
        </label>
    </body>
</html>
For brevity reasons, the CSS part is minimized.
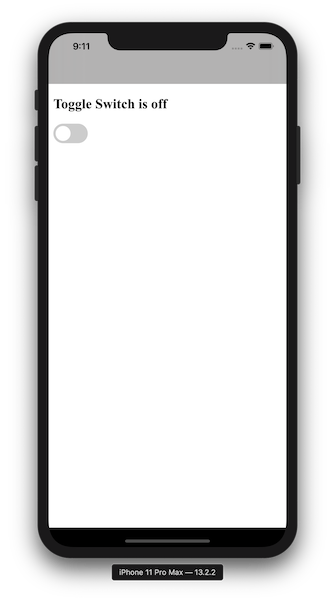
This HTML produces a web page with a label and a toggle switch. Our goal is to listen to the toggle events and update the text on the label to represent the corresponding state of the toggle switch.
Adding the WKWebView
To start with, we are going to add an instance of a WKWebView to a UIViewController and load the HTML file that we created earlier.
import UIKit
import WebKit

class ViewController: UIViewController {

    override func viewDidLoad() {
        super.viewDidLoad()

        view.addSubview(webView)
        NSLayoutConstraint.activate([
            webView.leadingAnchor.constraint(equalTo: view.leadingAnchor),
            webView.trailingAnchor.constraint(equalTo: view.trailingAnchor),
            webView.bottomAnchor.constraint(equalTo: view.layoutMarginsGuide.bottomAnchor),
            webView.topAnchor.constraint(equalTo: view.layoutMarginsGuide.topAnchor)
        ])

        if let url = Bundle.main.url(forResource: "index", withExtension: "html") {
            webView.loadFileURL(url, allowingReadAccessTo: url.deletingLastPathComponent())
        }
    }

    private lazy var webView: WKWebView = {
        let webView = WKWebView()
        webView.translatesAutoresizingMaskIntoConstraints = false
        return webView
    }()
}
Quite self-descriptive, we create a private instance of a WKWebView, we add it as a subview to the ViewController’s view, add the required AutoLayout constraints and then load the file.
Try to run the app, and you will see the page with the label and toggle, loaded in your WKWebView like in the following screenshot:
Adding the message handler
The next step is to enable our WKWebView to receive messages from the web-page and to accomplish that, we will make our UIViewController conform to the WKScriptMessageHandler protocol.
According to the documentation:
A class conforming to the
WKScriptMessageHandlerprotocol provides a method for receiving messages from JavaScript running in a webpage.
This protocol requires the definition of the function userContentController(_: didReceive:), so let’s add an extension to our ViewController class, add conformance to the WKScriptMessageHandler protocol and provide an implementation for this function.
extension ViewController: WKScriptMessageHandler{
    func userContentController(_ userContentController: WKUserContentController, didReceive message: WKScriptMessage) {
        guard let dict = message.body as? [String : AnyObject] else {
            return
        }

        print(dict)
    }
}
For now, we are assuming that the message sent from the web-page will be a dictionary, so we just transforming the body of a message to a dictionary and print the result.
After that, we have to make our WKWebView aware of this message handler. This can be done by adding this script message handler to the user content controller of the WKWebView.
According to the documentation:
A
WKUserContentControllerobject provides a way for JavaScript to post messages to a web view. The user content controller associated with a web view is specified by its web view configuration.
Let’s add the following lines directly after the AutoLayout constraints on the viewDidLoad function.
let contentController = self.webView.configuration.userContentController
contentController.add(self, name: "toggleMessageHandler")
In this snippet, we are accessing the userContentController of the web view and then call the add function, providing the instance of a class conforming to the WKScriptMessageHandler (in our case the ViewController’s instance), and a name, which we later use on the web-page to send the messages to the app.
Now, we are ready to send our messages from the web page.
Let’s see how!
Sending message from the webpage
For this part, we are going to use some JavaScript to listen to the toggle events and then send a message to the app. This message will reflect if the toggle is selected or not. Let’s edit our HTML file and before the closing </body> tag, let’s add the following content:
<script>
    var _selector = document.querySelector('input[name=myCheckbox]');
    _selector.addEventListener('change', function(event) {
        var message = (_selector.checked) ? "Toggle Switch is on" : "Toggle Switch is off";
        if (window.webkit && window.webkit.messageHandlers && window.webkit.messageHandlers.toggleMessageHandler) {
            window.webkit.messageHandlers.toggleMessageHandler.postMessage({
                "message": message
            });
        }
    });
</script>
In this script, we are adding an eventListener for the toggle change event, and depending on whether it is selected or not, we are using the messageHandler with name toggleMessageHandler that we created previously, to call the function postMessage which in turn will trigger the userContentController(_: didReceive:).
If you run the app and turn the toggle on and off, you will be able to see some messages on the console like ["message": Toggle Switch is on].
So far so good, but what happens if we don’t have access to the web-page to add the JavaScript snippet and we still want to receive the message? Fortunately, we can inject some JavaScript code to a web-page that we load on a WKWebView!
Injecting JavaScript
Let’s start by removing the JavaScript code that we added on the HTML. Next, open the ViewController again, and add the following snippet after the contentController.add(self, name: "toggleMessageHandler") line.
let js = """
    var _selector = document.querySelector('input[name=myCheckbox]');
    _selector.addEventListener('change', function(event) {
        var message = (_selector.checked) ? "Toggle Switch is on" : "Toggle Switch is off";
        if (window.webkit && window.webkit.messageHandlers && window.webkit.messageHandlers.toggleMessageHandler) {
            window.webkit.messageHandlers.toggleMessageHandler.postMessage({
                "message": message
            });
        }
    });
"""

let script = WKUserScript(source: js, injectionTime: .atDocumentEnd, forMainFrameOnly: false)
contentController.addUserScript(script)
In this snippet, firstly we create a string variable with the JavaScript code that listens to the toggle events and sends the message to the messageHandler. Then, we are creating an instance of WKUserScript with this code as a source, and finally we inject it to the WKWebView by adding it to the contentController that we also used earlier.
If you run the app again, you will notice the same behavior as before.
Last thing to achieve our goal, is to update the webpage.
Evaluating JavaScript to update webpage’s UI
WKWebView provides a function to evaluate JavaScript code and this is what we are going to use to update the UI.
Head over to the function userContentController(_: didReceive:) that we defined on our extension and instead of the print command, add the following snippet:
guard let message = dict["message"] else {
    return
}

let script = "document.getElementById('value').innerText = \"\(message)\""

webView.evaluateJavaScript(script) { (result, error) in
    if let result = result {
        print("Label is updated with message: \(result)")
    } else if let error = error {
        print("An error occurred: \(error)")
    }
}
In this snippet, we are accessing the value of message key from the dictionary, create a variable with the JavaScript code to change the label on the web-page, and then use the evaluateJavaScript to execute this code. evaluateJavaScript takes a closure as a second argument to check if there was an error during the evaluation of the JavaScript code.
And that’s about it, if you now run the app, the text of the label will change when the toggle is switched on or off.
Insight
In this post, we have seen how to achieve bidirectional communication between a WKWebView and the website it loaded. Using this, we can use events from the website to trigger actions on the app and similarly adjust the loaded website based on the information we have on the app.
Thanks for reading, I hope you find this post useful! Feel free to follow me on Twitter and share your comments about this post!
