In this post, I am going to walk you through the process of setting up a CI(Continuous Integration) workflow with GitHub Actions on a Scala project.
More specifically, first, we will see how to prepare our project and enable the tasks that we want to include in our CI pipeline. Such tasks could be, for example, unit tests, code coverage and code formatting. Once all the preparation is done, we are going to set up a GitHub Actions workflow to run those tasks on an open PR(Pull Request) or when we push code to specific branches.
Let’s get started!
Preparation
Unit tests
Let’s start by adding the unit tests. At first, we will create a new file in the directory src/test/scala/MainTest.scala where we are going to add the unit tests. For this post, I will add a dummy test like the one in the snippet below:
import org.scalatest.funsuite.AnyFunSuite

class MainTest extends AnyFunSuite {
  test("Example test") {
    assert(1 == 1)
  }
}
Once done, head over to the build.sbt and add the following line libraryDependencies += "org.scalatest" %% "scalatest" % "3.1.0" % Test to add the test dependency.
Now, we are ready to use the command sbt clean test to run our tests.
Code Coverage
A term closely related to unit tests is code coverage. Code coverage is a metric that gives you an overview of how much of the program is covered with tests.
Let’s see how we can see the coverage for our project.
In the project directory, open the file plugins.sbt or if it doesn’t exist, create a new one and then open it. In this file, add the line addSbtPlugin("org.scoverage" % "sbt-scoverage" % "1.6.1"), to add the coverage plugin. After that, open the file project/build.properties and make sure that the SBT version is defined like so: sbt.version=1.3.9.
Once all these are done, you are ready to execute the command sbt clean coverage test to run the tests with coverage. This command will create the directory target/scala-2.13/scoverage-data where you can find the results of the coverage.
If you prefer a more human-readable form of the results, run the command sbt coverageReport to generate coverage reports. This command will output the coverage and also generate Cobertura, XML and HTML reports on the directory target/scala-2.13/.
Hint: You could also run tests and generate the coverage report with a single command:
sbt clean coverage test coverageReport.
Code Formatting
Next one in the list is code formatting. Sometimes it is hard to keep a consistent codebase on a project where a lot of people are working. And for this reason, there are some tools to help us define some set of rules and conventions that we want our code to adhere to.
scalafmt is one such tool for Scala(if not the most popular). scalafmt provides a way to define the code style in a configuration file and formats the code according to that.
Let’s see how we can add scalafmt to our project.
Same as before, open the file project/plugins.sbt and add the following line addSbtPlugin("org.scalameta" % "sbt-scalafmt" % "2.3.0") to enable scalafmt. Then, create a new file on the root directory of your project and name it .scalafmt.conf. In this file, you will add the configuration based on which you want to format your code.
For example, you can use something like the following snippet:
version = "2.4.2"

style = default
maxColumn = 80
encoding = "UTF-8"
continuationIndent {
  callSite = 2
  defnSite = 2
}
assumeStandardLibraryStripMargin = true

project.git = true

align = some
align.tokens = [
  {code = "=>", owner = "Case"},
  {code = "%", owner = "Term.ApplyInfix"},
  {code = "%%", owner = "Term.ApplyInfix"}
]

newlines.alwaysBeforeTopLevelStatements = true

rewrite {
  rules = [AvoidInfix, SortImports, RedundantBraces, RedundantParens, PreferCurlyFors]
}
Note: You can refer to scalafmt’s documentation page for a more detailed description of all the available options.
Now, you can head to your command line tool and execute the command sbt scalafmtAll to format the code for all the configurations. Apart from this, scalafmt supports a few other tasks that you can find on the task section of scalafmt’s documentation page.
Cool! With everything ready, it’s time to setup GitHub Actions!
GitHub Actions
On your project, create the directory .github/workflows and add a file named scala.yml. This is the file where we are going to define the CI workflow.
Let’s open this file and let’s start by adding a name.
name: Scala CI
Then, it’s time to specify the events that will trigger the workflow:
on:
  push:
    branches:
        - master
        - develop
  pull_request:
    branches:
        - master
        - develop
In this area, we set that a push or a pull request to the master and develop branch will trigger the workflow.
Now, let’s define our workflow. In our case, we want to run unit tests, generate a coverage report and run the lint check.
Here is a example of such a workflow:
jobs:
  test:
    runs-on: ubuntu-latest
    steps:
    - uses: actions/checkout@v2
    - name: Run tests
      run: sbt coverage test
    - name: Coverage Report
      run: sbt coverageReport
    - name: Upload coverage to Codecov
      uses: codecov/codecov-action@v1
      with:
        fail_ci_if_error: true
  lint:
    runs-on: ubuntu-latest
    steps:
    - uses: actions/checkout@v2
    - name: Formatting
      run: sbt scalafmtSbtCheck scalafmtCheck test:scalafmtCheck
Note: This snippet is also available in this gist.
Let’s explain what we are doing in this snippet. In total we have 2 jobs named test and lint. On the test job, we define three steps: one to run the test with coverage, one to generate the coverage report and one to upload the coverage to Codecov(More on that in a while). On the lint job, we define one step that run a command to check for any scalafmt issues.
Our GitHub Action workflow is ready!!
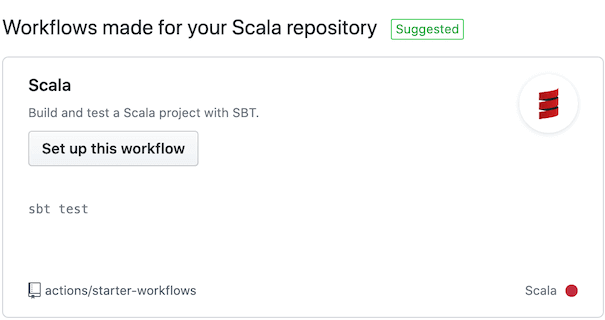
Note: Instead of creating a file locally, you could visit your GitHub repository page and press on the
Actionstab on the top navigation bar. In this page, find the template that matches the language and the framework of your project and click on theSet up this workflow.
Codecov
Before we push the configuration and run the workflow, we have to setup Codecov.
Codecov is a solution that will help us visualize the code coverage of the project. Some of its advantages are that it requires minimal setup, it’s widely used by the community and it’s free for open source projects.
To integrate your project with Codecov, all you have to do is to sign-up or login on Codecov’s website with your GitHub account, and make sure that you can find the repo you would like to apply the coverage for.
If so, you are good to go and use the Codecov GitHub Action from your CI workflow, like I did in scala.yml. To trigger the workflow, push a new branch with the scala.yml file and create a new Pull Request targeting the develop branch. Once the PR is open, the workflow will start.
You can also visit the Actions tab on GitHub, where you can see the progress of the workflow in details, add a new workflow and create the status badge for your README file.
![]()
And that’s about it!!
Conclusion
In this post, we have seen how to setup unit tests, code coverage, code formatting and how to use all of these on a Continuous Integration pipeline.
From now on, I will know that whenever I make a change in a project, it won’t break any previously tested functionality and it will adhere to the coding style that I have set.
And that’s why I believe that having a Continuous Integration setup is useful. It will be the one responsible for doing all the tedious but yet important tasks of checking the quality and integrity of the changes we want to make, allowing us to focus on more important aspects of the project. ![]()
Thanks for reading! If you found this post useful, consider buying me a coffee to support the blog. For questions or comments, feel free to reach out on X!
Until next time!
