In the previous article, we described the steps required to set up Firebase Remote Config and A/B testing. So, it is time to proceed with the implementation of a demo app. In this article, I will showcase the process of integrating Firebase Remote Config into an iOS app and I will use the login screen example described in the previous article.
Setup iOS app
First thing first, in case you haven’t done that yet, add the following two lines on the Podfile.
  pod 'Firebase/Core'
  pod 'Firebase/RemoteConfig'
Then, let’s setup our models. The data used in the previous article is as the following:
{
  "label": {
    "text": "Welcome to Remote Config Demo"
  },
  "button": {
    "text": "Continue",
    "color": {
      "red": 50,
      "green": 205,
      "blue": 50
    }
  }
}
Our goal is to map this JSON to a Swift struct and then use this struct when manipulating the user interface. Firebase Config data can be mapped as String, Number, Boolean. In our case, since the expected data is a JSON, it would be nice if we can get the data as NSData and then using Codable protocol to decode it.
So, based on the JSON value, we define 4 structs.
struct LabelConfig: Codable {
    var text: String
}
struct ButtonConfig: Codable {
    var text: String
    var color: ColorConfig
}

struct ColorConfig: Codable {
    var red: Int
    var green: Int
    var blue: Int
}

struct ScreenConfig: Codable {
    var label: LabelConfig
    var button: ButtonConfig
}
Then, let’s create an enum with all the possible parameter keys that are set up on the Firebase Config. Currently, there is only the login option, but there can be potentially more.
enum RemoteConfigParameters: String, CaseIterable {
    case login = "login_screen"
}
Continuing, we will need an extension on this enum to get the value for each option. Using extensions is a nice way to provide a user-friendly interface and at the same time stay consistent with the separation of concerns. This extension provides a helper function to convert the data fetched from remotely to a codable type. And the property value takes advantage of this helper to map the parameter key to a codable model. In our case, login_screen will decode the data to ScreenConfig.
extension RemoteConfigParameters {

    var value: Codable? {
        switch self {
        case .login:
            return try? self.toCodable().get() as ScreenConfig
        }
    }

    private func toCodable<T: Codable>() -> Result<T, Error> {
        let data = RemoteConfig.remoteConfig().configValue(forKey: self.rawValue).dataValue
         return Result { try JSONDecoder().decode(T.self, from: data) }
    }
}
Because the data is fetched over the wire, a lot of things can go wrong. For this reason, and since we want the app to still function regardless of the availability of the Remote Config data, default values should be provided for every parameter key that we are using. These values will act as a lifeguard in case something goes wrong. In order to do so, another extension, that will provide a defaultValue property, is added to RemoteConfigParameters.
This is also another “nice” use of enums combined with switch statements. On a potential scenario of adding a new parameter key, you will not have to remember to add a default value. The compiler will do it for you, by providing a graceful warning stating that “Switch must be exhaustive” :P.
extension RemoteConfigParameters {
    var defaultValue: Data {
        switch self {
        case .login:
            let config = ScreenConfig(
                label: LabelConfig(
                    text: "Welcome to Remote Config Demo (default)"
                ),
                button: ButtonConfig(
                    text: "Continue (default)",
                    color: ColorConfig(red: 50, green: 206, blue: 50)
                )
            )

            return try! JSONEncoder().encode(config)
        }
    }
}
Now, that everything is ready, it is time to fetch the remote data. Since fetching is asynchronous, it would be nice if the UI can reflect the state of the fetching. An enum named RemoteConfigState will be used for this reason, and it will define the possible states.
enum RemoteConfigState {
    case loading
    case loaded
    case error
}
Then, to fetch the Remote Value, a new enum named RemoteConfigFetcher is added.
enum RemoteConfigFetcher {
    // 1
    static private(set) var state: RemoteConfigState? = nil
    // 2
    static var finishCallback: (() -> Void)? = nil

    // 3
    static func fetch() {
        setDefaultValues()
        DispatchQueue.global().async {
            fetchRemoteValues()
        }
    }

    // 4
    private static func setDefaultValues() {

        let appDefaults = RemoteConfigParameters.allCases.reduce([String: NSObject]()) { (dict, param) -> [String: NSObject] in
            var dict = dict
            dict[param.rawValue] = param.defaultValue as NSObject
            return dict
        }

        RemoteConfig.remoteConfig().setDefaults(appDefaults)
    }

    // 5
    private static func fetchRemoteValues() {

        state = .loading
        #warning("Only set expirationDuration to 0 in debug mode.")
        let expirationDuration: TimeInterval = 0
        RemoteConfig.remoteConfig().fetch(withExpirationDuration: expirationDuration) { (status, error) in
            defer {
                finishCallback?()
            }
            guard error == nil, status == .success else {
                state = .error
                return
            }
            RemoteConfig.remoteConfig().activateFetched()
            state = .loaded
        }
    }
}
To explain in a little more details what this enum is doing, I added some numbers in the comments.
- a
private(set)property to keep the state of the request. It will later be used to render the right screen based on the state of the fetching. - a callback that will be used to inform the caller when fetching is finished.
- the public function that will start the process of fetching the Remote Config data. First, it calls the function to set the default values and then calls the function to fetch the Remote Config data.
- a function to set Remote Config default’s values. It basically transforms all the cases of
RemoteConfigParametersto defaults parameters for RemoteConfig, using the function previously described to provide default values for each case. - the main function, which triggers the remote fetch. On the callback,
deferis used to trigger the finishcallback when everything is set up, and then there is a control statement to check if there is an error or not. According to that, thestateproperty is change to reflect the response.
That’s it all we need to do to fetch the values from Firebase. Now it is time to see how we will use this enum in our app.
Let’s move to the AppDelegate and particularly in the didFinishLaunchingWithOptions function. Two lines will be added to configure Firebase and to trigger the RemoteConfigFetcher to fetch the values.
.
.
    func application(_ application: UIApplication, didFinishLaunchingWithOptions launchOptions: [UIApplication.LaunchOptionsKey: Any]?) -> Bool {
        // Override point for customization after application launch.

        FirebaseApp.configure()
        RemoteConfigFetcher.fetch()
        return true
    }

.
.
Then, let’s move to the ViewController.
import UIKit

class ViewController: UIViewController {

    override func viewDidLoad() {
        super.viewDidLoad()

        renderScreen()
    }

    private func renderScreen() {

        if RemoteConfigFetcher.state == .loaded {
            showScreen()
        } else if RemoteConfigFetcher.state == .error {
            showError()
        } else {
            showLoadingView()
            RemoteConfigFetcher.finishCallback = renderScreen
        }
    }

    private func showLoadingView() {
        label.text = "Loading..."
        button.isHidden = true
    }

    private func showError() {
        label.text = "An error happened"
        button.isHidden = true
    }

    private func showScreen() {

        guard let config = RemoteConfigParameters.login.value as? ScreenConfig else { return }
        label.text = config.label.text
        button.setTitle(config.button.text, for: .normal)
        button.tintColor = UIColor(
            red: CGFloat(config.button.color.red) / 255.0,
            green: CGFloat(config.button.color.green) / 255.0,
            blue: CGFloat(config.button.color.blue) / 255.0,
            alpha: 1
        )
        button.isHidden = false
    }

    @IBOutlet weak private var button: UIButton!
    @IBOutlet weak private var label: UILabel!
}
Here, we make use of the state property to reflect it in to the UI. If the request is not finished, we show a label stating that it is loading. In case of an error, a corresponding screen is shown. When the data is fetched successfully, using the extension of RemoteConfigParameters, we get the data and adjust the UI components according to it.
Conclusion
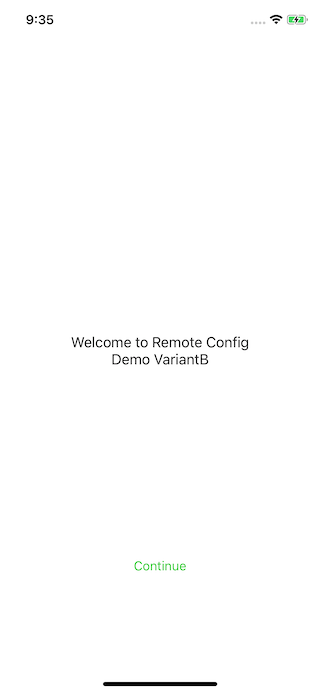
And that’s it, now the app will look like this!!
And not only that, but, having Firebase Remote Config set up, you also get A/B testing!!
In a handful of steps we manage to integrate an iOS app with Firebase Remote Config and A/B testing using the login screen as an example. This enable us to control remotely some aspects of the user interface and at the same time experiment with the texts.
Thanks for reading! If you found this post useful, consider buying me a coffee to support the blog. For questions or comments, feel free to reach out on X!
Until next time!
