What are the initial steps that you take when creating a new iOS project?
Regardless of the language or the framework, it’s quite common when creating a new project, to do some basic project setup before you even start writing the first line of code.
And of course iOS projects could not be the exception to this. Having a basic setup in place from the beginning of the project can be proved invaluable in the later stage of the development, potentially allowing you to be more efficient and confident, and generally have a better developer experience.
In a series of two (or maybe more?) posts, I am going to try and sum up all the basic actions that I usually do when I create a new iOS project.
In this first post, I will focus on the .gitignore, Bundler, CocoaPods, project configuration and SwiftLint.
Let’s start!
.gitignore
The first thing that I usually do when I create a new project is to add a .gitignore file. It’s the place where you define the files and directories that you don’t want to track in your version control system.
For an iOS project, a basic .gitignore could be like the following:
## User settings
**/xcuserdata/*

## App packaging
*.ipa
*.dSYM.zip
*.dSYM

# fastlane
fastlane/report.xml
fastlane/Preview.html
fastlane/screenshots/**/*.png
fastlane/test_output

# CocoaPods
Pods
Bundler
After the .gitignore, I will add Bundler. Bundler is a dependency manager for RubyGems. Like CocoaPods but for Ruby.
A lot of tools, that are quite common on the daily routing of an iOS developer, are distributed as ruby gems. CocoaPods and Fastlane are two such examples.
Using Bundler, you can have a better control over the versions of those dependencies. This will help you to make sure that everyone working on the project and also CI tools use the same versions. Furthermore, contrary to the use of globally installed gems, it allows you to use different versions for different projects in the same machine.
Bundler is a gem as well, so to install it, you have to run gem install bundler.
I totally recommend using either RVM or rbenv to install Ruby and handle its versions on your local machine.
Bundler uses a file named Gemfile to define dependencies, so let’s run touch Gemfile on the root directory of the project to create one.
Next, open this file and add the following content:
source 'https://rubygems.org'

gem 'cocoapods', '~>1.9.1'
gem 'fastlane', '~>2.145.0'
Save this file and run bundle install. It may take some time and when it’s done, all the dependencies will be installed and a new file named Gemfile.lock will be created.
Gemfile.lock keeps the exact versions of the installed gems, something like the Podfile.lock but for Bundler.
Now you will be able to use commands like bundle exec pod install or bundle exec fastlane lane!
If you find these commands too verbose, remember that you always have the option to create an alias
alias bep='bundle exec pod'
alias bef='bundle exec fastlane'
CocoaPods
With Bundler ready, we can now set up CocoaPods. CocoaPods is a dependency manager for an iOS project.
Dependencies are defined on a file named Podfile and to create one, run bundle exec pod init from the root directory of your project.
This will also create the .xcworkspace file, which is the file you will have to use from now on instead of the .xcodeproj.
To install any dependencies and to create the Podfile.lock, run bundle exec pod install
I am also considering the option of using Swift Package Manager for future projects. If you have some experience using both of them, feel free to reach me on X and let me know about the pros and cons.
Configurations
Next in the list is configurations. By default, a new Xcode project comes with two configurations (Debug and Release) but it’s quite common that they are not enough.
If the app makes API requests to a server or uses some 3-party tool with API keys, we may need to define more configuration to handle the different environments. To cater for these scenarios, I usually add configurations for Dev, Staging and Prod for each of the existing configuration, thus ending up with a total of 6 different configurations.
To add a new configuration, open the project file and select the Project from the left pane. Then select the Info tab from the top bar and find the Configurations section.

Press the + button and select which one from the existing ones you want to duplicate. If you want to change the name of an existing one, double-click on the name and change it.
Now that we have our configurations ready, another problem arises when installing the app on a phone, since all the configurations have the same Bundle Identifier. Because of this, we cannot have both the “Dev” and the “Staging” version of the app on the device at the same time. To fix this problem, let’s provide a different Bundle Identifier for each environment.
First, head to the Info.plist file and make sure that the key CFBundleIdentifier has $(PRODUCT_BUNDLE_IDENTIFIER) as a value. Then, open the Project file, select the app target from the left pane and open the Build Settings tab. There, search for PRODUCT_BUNDLE_IDENTIFIER. In the Product Bundle Identifier section, you can change the bundle identifier for each configuration as you wish. For example, based on the environment, you can append the existing value with .dev or .staging.
With this, you will be able to have both a Dev and Staging version installed at the same time, but it would be hard to recognize which one is which since they use the same name. So, let’s fix that too.
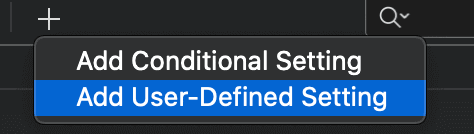
In the Build Settings tab, click on the + button on the top bar and select the option Add User-Defined Setting.
Set APP_DISPLAY_NAME as the name for the newly created setting and set the value to ${PRODUCT_NAME} for all the configurations and then prepend with Dev and Staging for the corresponding configurations.
After that, add an entry to the Info.plist with key Bundle display name and set its value to the variable $(APP_DISPLAY_NAME). Alternatively, you can open the Info.plist as a source code and add the following key-value pair inside the root dict:
  <key>CFBundleDisplayName</key>
  <string>$(APP_DISPLAY_NAME)</string>
So, now that we have CocoaPods and Configurations ready, let’s move on and add some tooling!
SwiftLint
I will start with SwiftLint. SwiftLint is a tool to enforce styling conventions on a iOS project.
Since I had wrote a separate post about SwiftLint before, I will not focus too much on the details of this tool. Feel free to refer to this post, if you are interested to learn more.
Briefly, we first add the line pod 'SwiftLint', :configurations => ['DebugDev'] in the Podfile. After that, save the file and run bundle exec pod install. Once the execution of this command is over, head to Xcode and create a new Build Phase for the app’s target.
Press the + sign on the top right corner and select the option New Run Script Phase. Name the Run Script Phase as SwiftLint and add the following content:
if which "${PODS_ROOT}/SwiftLint/swiftlint" >/dev/null; then
    ${PODS_ROOT}/SwiftLint/swiftlint --config .swiftlint.yml
else
    echo "warning: SwiftLint not installed, download from https://github.com/realm/SwiftLint"
fi
Lastly, create a file named .swiftlint.yml and add the rules that you want your code to conform to.
Now, every time you build the app, you will be able to see all the linting issues as warnings or errors.
Conclusion
And that’s about it for this post. Until now, we have set a decent base on top of which we can start building our app. But that’s not all!
In the next post, I am going to focus on topics like Fastlane, CI, project structure, file templates, tools like R.swift which allows you to have strongly typed assets and maybe more.
Thanks for reading! If you found this post useful, consider buying me a coffee to support the blog. For questions or comments, feel free to reach out on X!
Until next time!
